
Brake levers, calipers, cables and rotors
I opted for the Shimano MT200 hydraulic brakes, which work sufficiently well in Singapore given that we don’t really have that many steep descents. The good thing about the MT200 is that it is really simple to install, as the brakes already come pre-bled and the cables are already joined up for you.
If you get a MT200 with full packaging, the front and rear brake should be 1000mm and 1700mm respectively. I find this to be the ideal length and it gives you sufficient clearance even on the longest of handlepost stems. If you prefer using a shorter handlepost stem, however, there are some sellers on Carousell which sell OEM versions of the MT200 (without any packaging) with shorter cabling (e.g. 800mm and 1600mm).
For the MT200, as it comes in a “post mount” configuration and the bike comes with an “international standard (IS) mount”, you will need to get an adapter to connect the MT200 appropriately. For the front brakes, you will need to look for a “0mm IS to Post” mount adapter which fits 160mm rotors. For the rear brakes, you will need to look for a “+20mm IS to Post” mount adapter. This works fine for the front and this works fine for the rear. From my experience, I’ve noticed two different types of 0mm and +20mm adapters. For the MT200, get the ones that look similar to the links I posted above. The MT200 does not require the use of any washers–using one would cause uneven pad wear.
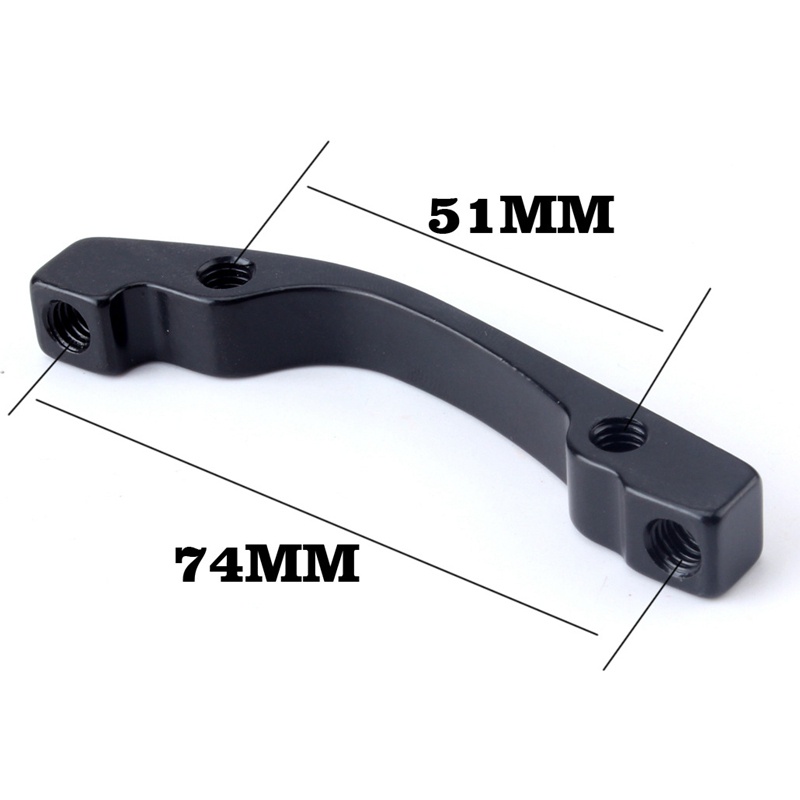
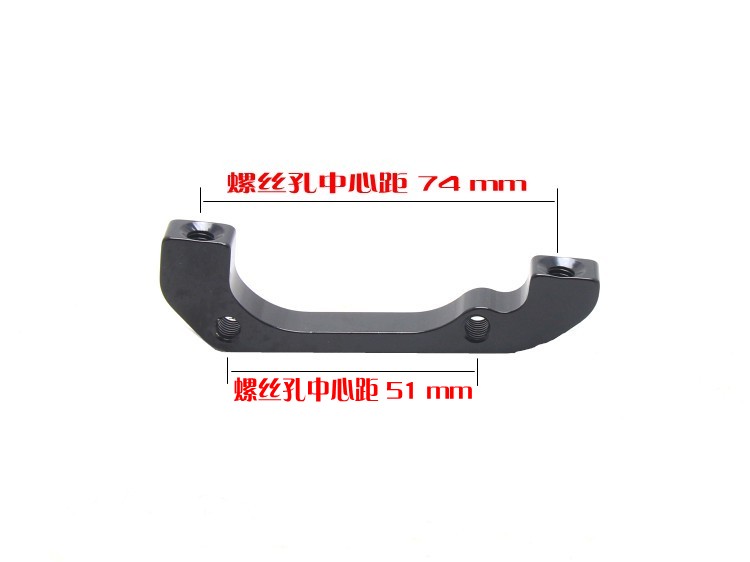
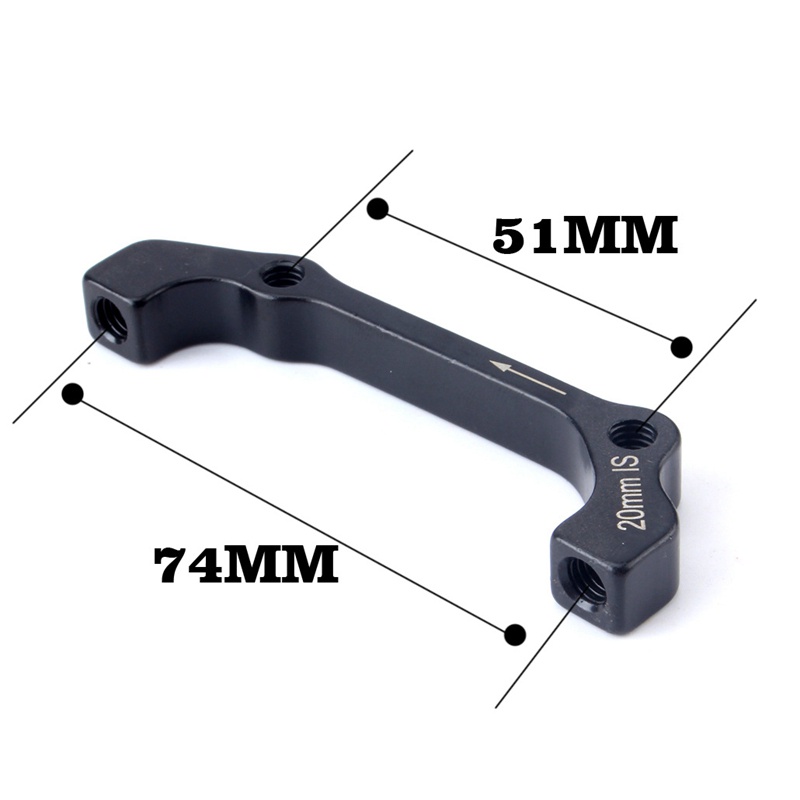
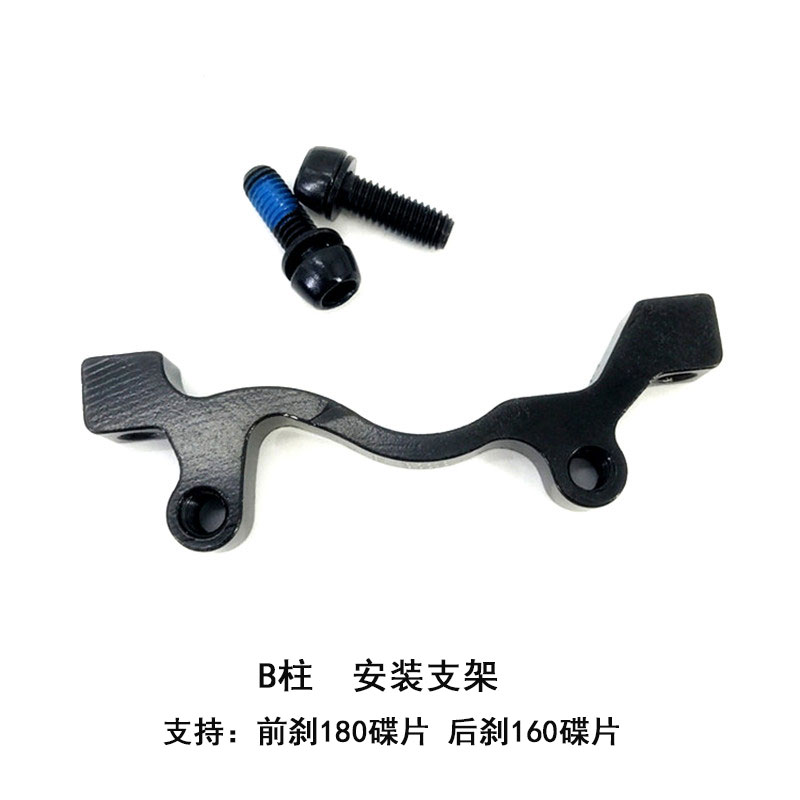
When installing the brake adapter, the arrow should be pointing upwards in the case of the front brake, and to the front of the bicycle in the case of the rear brake.
The MT200 also requires the appropriate rotors to be used. As the MT200 has a special, wide pad design, it is recommended that only compatible Shimano “wide” rotors be used. Unfortunately, this means you are restricted to a number of lower-end options from Shimano. I use the SM-RT56 rotors, which is the highest end of the cheap rotors. It works well for me so far and is very silent provided the rotors and pads do not get contaminated. I tried Avid HS1s as well, they do work fine in a pinch but will cause uneven pad wear and I find it to be slightly noisier (it has an audible ‘gasp’ whenever you brake).
Wheels, tyres and tubes
For this build, I decided to reuse the Litepro Aero 451 wheels which came on the Crius Master D and went out to buy another set of Litepro Aero 451 wheels as a replacement for the Master D.
As it turns out, not all Litepro Aero wheels are equal. For one, there are different spoke designs and apparently, different hub designs. In addition, some wheels are branded “TXB“ whereas some come with “Crius” branding or are simply unbranded.
My two set of wheels come with the “Crius” branding. One of them has a “three-spoke” design on the rear wheel whereas the other comes in a more conventional pattern with three additional spokes.
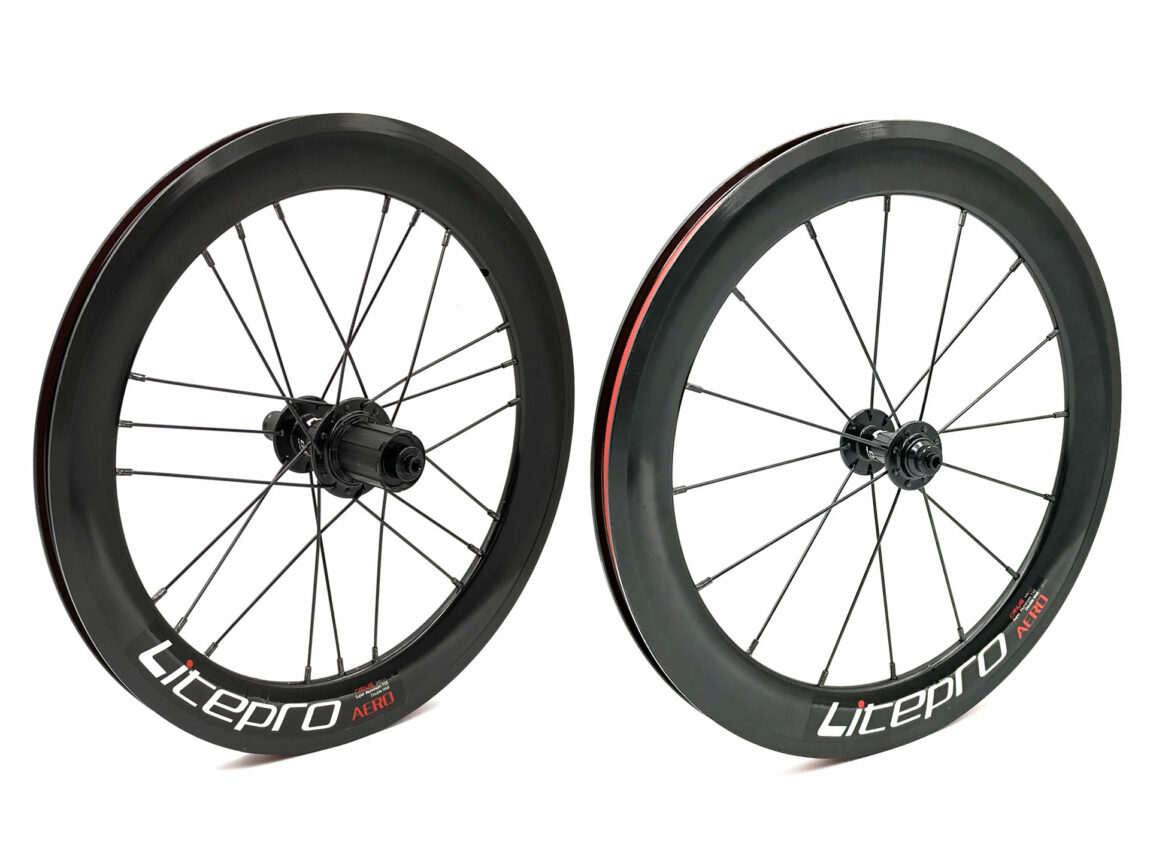
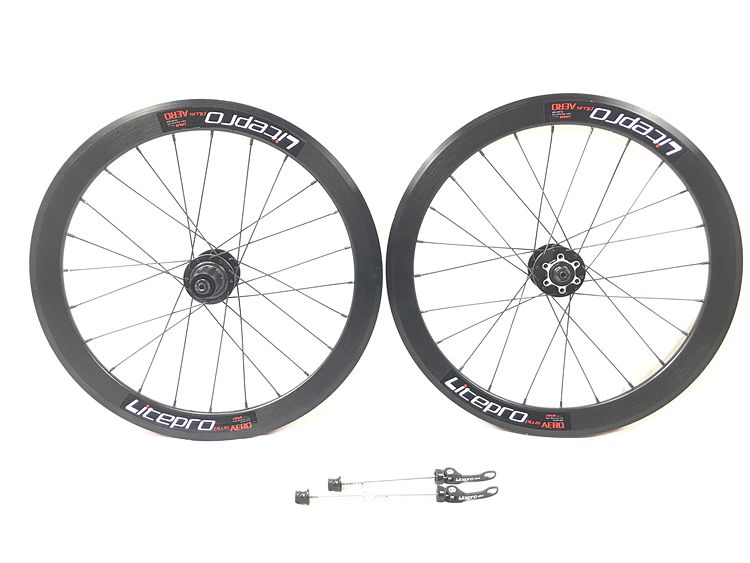
Personally, I prefer the “conventional” design as it has a quieter hub and spins with less resistance. The “three-spoke” design has a far noisier hub and does not spin as freely as the one with the conventional design. The only advantage of the freehub on the “three-spoke” design version is that it has five pawls instead of three, so when you start to pedal forward after freewheeling, it will ‘bite’ onto the teeth more quickly.
For tyres, I have tried both Kenda Kwest and Schwalbe One tyres, and both are pretty good. Tubes are those typical CST tubes which are very common these days. For these wheels with high-profile rims, it is best to opt for a tube with a 60mm long valve. I tried the shorter 48mm valve and it barely protruded out of the rim (although you can still pump air through it so I guess it will still work).
When installing, remember to install the rim tape which comes with the wheel! I missed that out on my first installation and the tube burst after pumping it up to 100psi…
The QR skewers which come with the bike are nothing much to shout about. I am looking to replace them with Shimano internal cam skewers which apparently clamp better.
The lockcap to access the freehub have to be unwound using two 17mm cone wrenches. You may have to use a set of locking pliers to pull out the other side after you’ve removed one side, though.
A note about 451 wheelsets — these wheels are really thin and has the tendency to skid on wet roads. On pavements, be really careful when you ride over drain covers when wet — do not attempt to turn the bicycle or brake while doing so. I also noticed sheltered walkways can get really slippery sometimes when wet.
Gear shifter, derailleur and cables
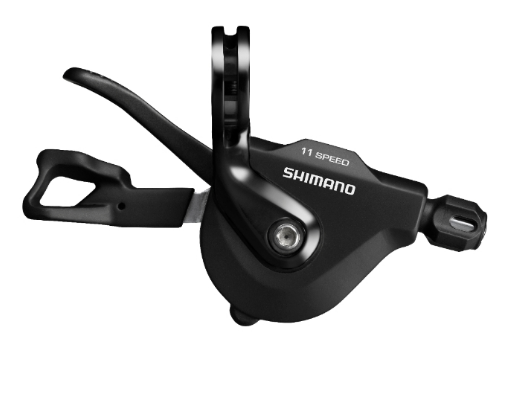
For the gear shifter and derailleur, I opted for the 11-speed Shimano 105 SL-RS700 and the RD-R7000 respectively. The SL-RS700 is pretty much the only 11-speed flat bar option out there from Shimano for road bikes, and I bemoan the lack of a shift indicator, though it is something you do get used to rather quickly.
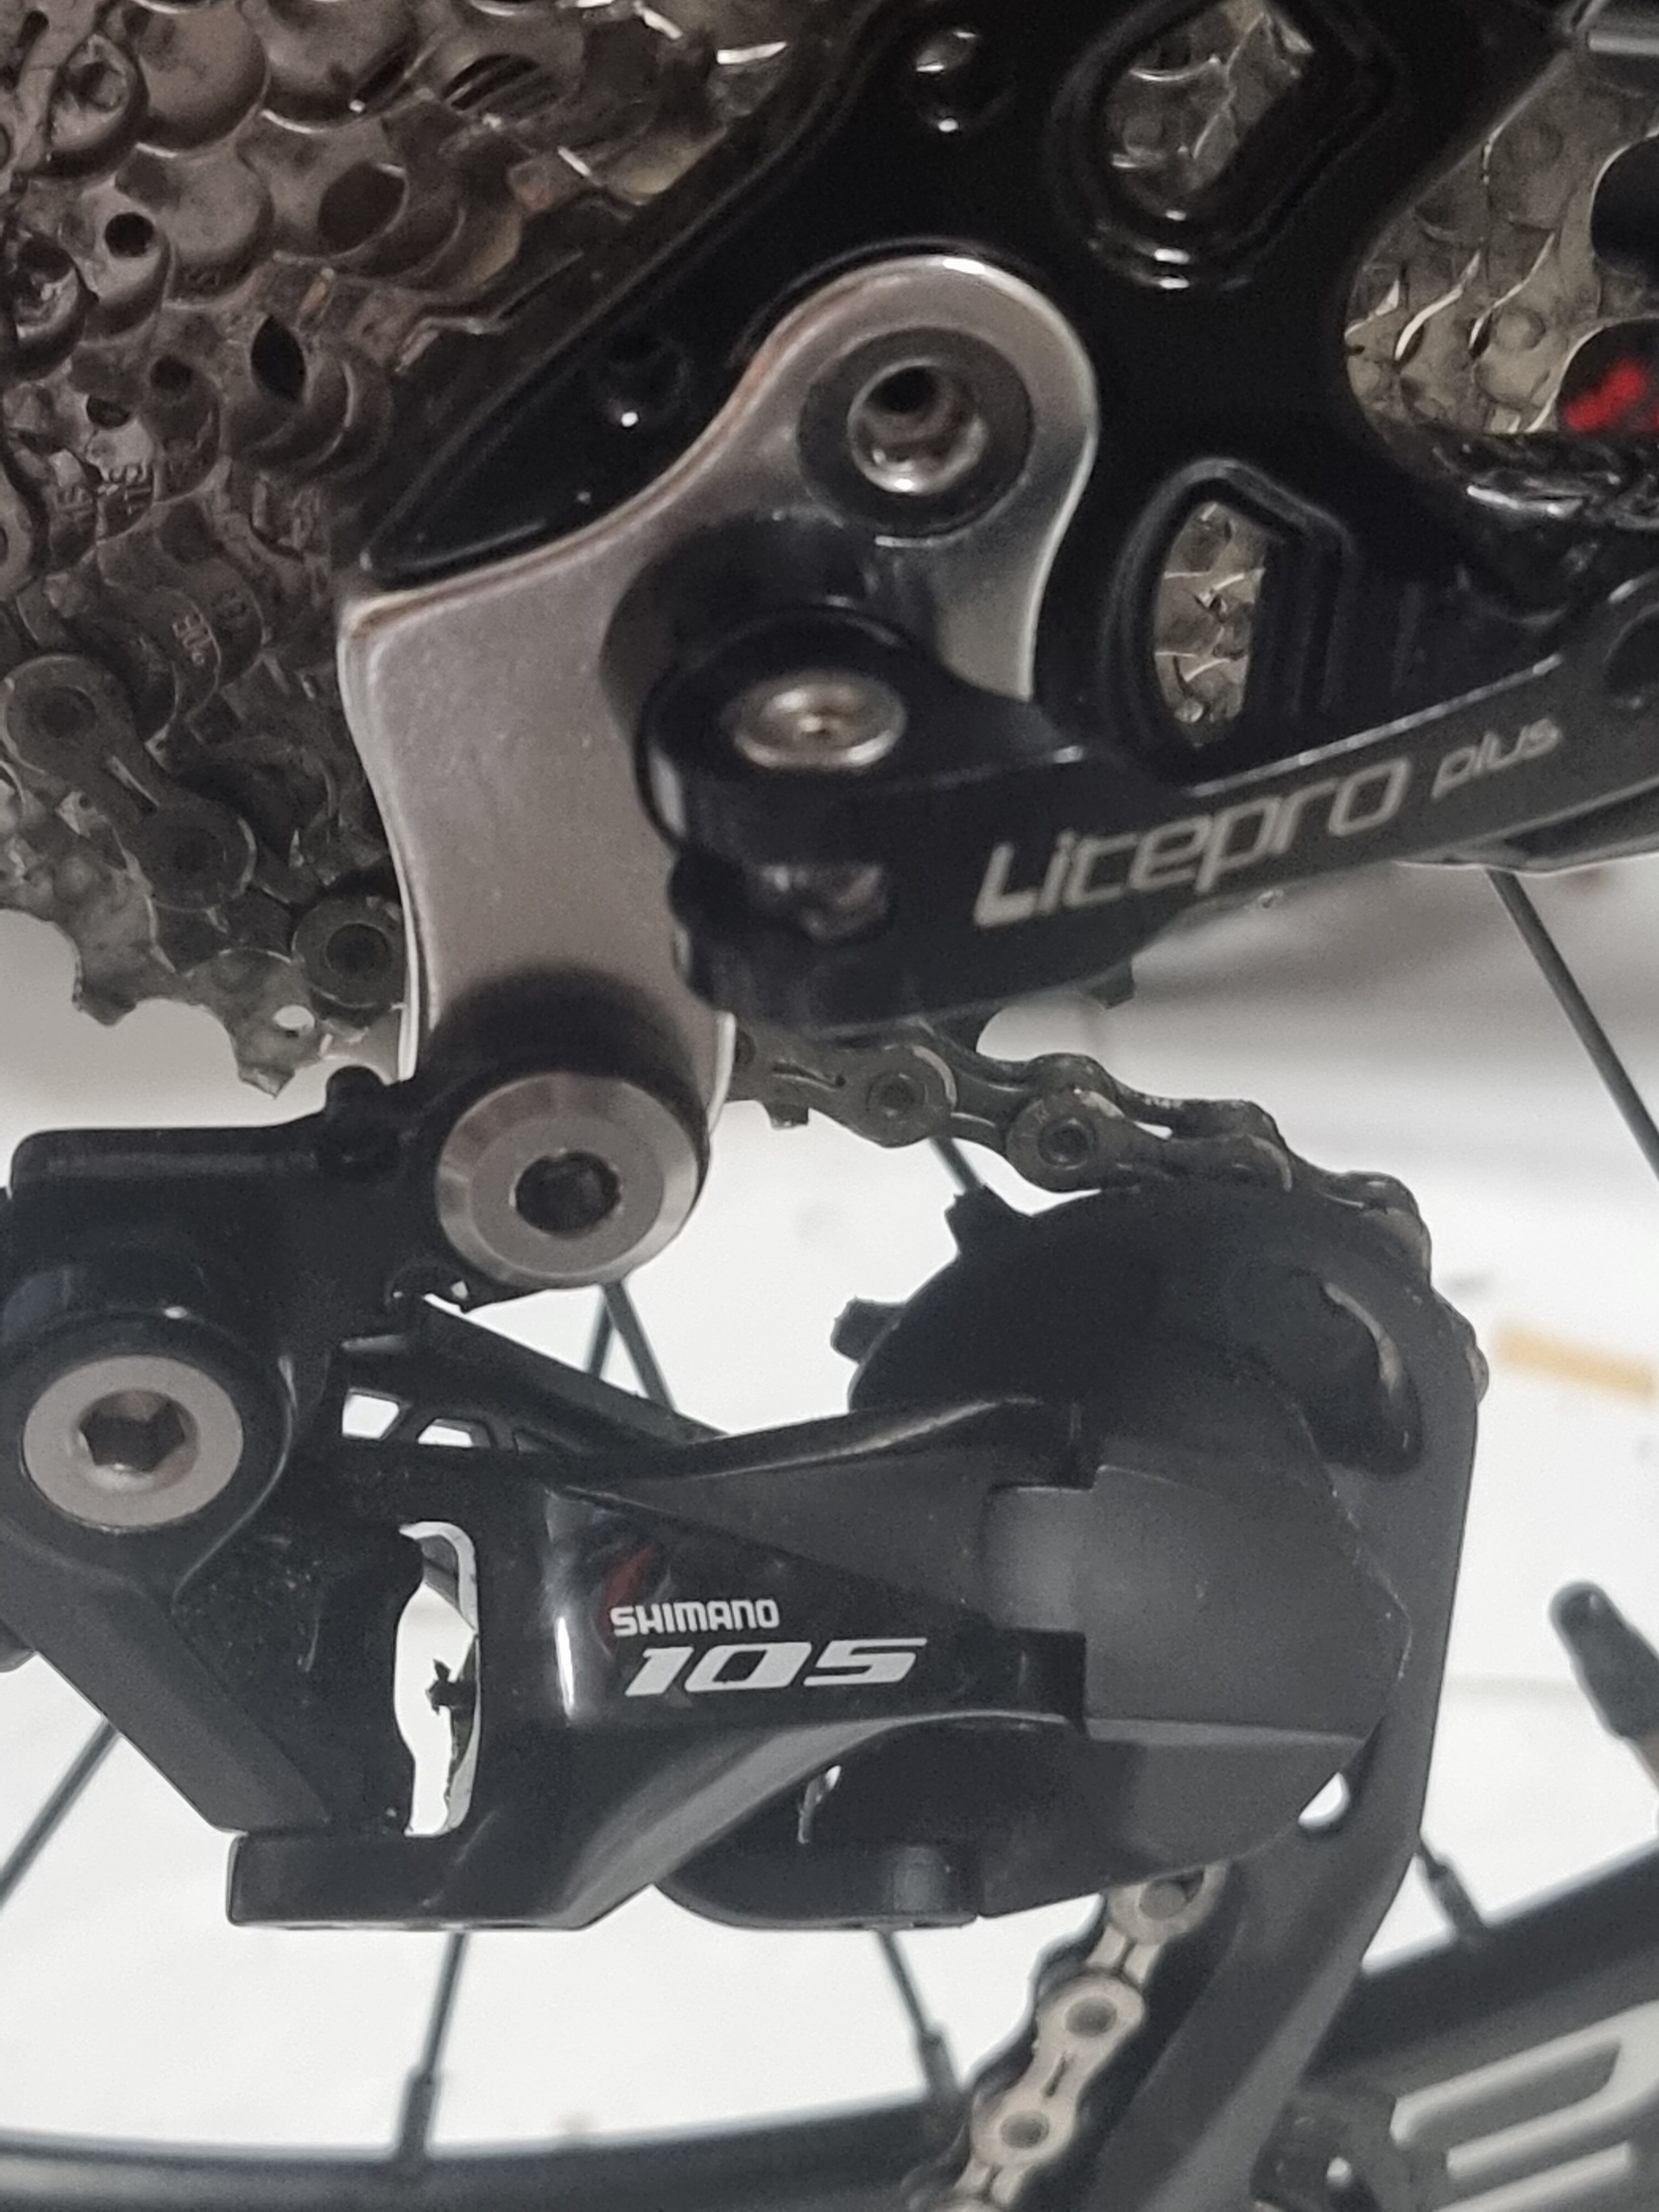
For the derailleur, I used the Shimano 105 RD-R7000, which, given the Ultegra’s recent shift to electronic shifting, has become the current top-end mechanical derailleur in Shimano’s road lineup. I had issues with gear tuning at first, which I resolved (somewhat) through aligning the derailleur hanger and ensuring that the cables are routed through the path of least resistance.
If you’re looking to save some money, you can pair a 11-speed shifter with the cheaper Shimano Tiagra RD-4700 (note: only this particular model of the Tiagra!), which has the same cable pull ratio as the R7000.
And if you’re deciding between a 9-speed Sora, 10-speed Tiagra or 11-speed 105, to tell you the truth, I do not notice a differnece in terms of shifting performance. What you gain is just more granular control over your gear selections (as you now have 11 gears instead of 9 or 10 to play with), although I realise that 11-speed is starting to get a little excessive. On hindsight, 9-speed is more than sufficient, but hey, the more the merrier, right?
Speaking of cables, I’m currently using Jagwire LEX-SL for the cable housing, and I believe Jagwire slicks for the cable itself. You also need to get yourself some cable end caps and crimp the wire at the end to prevent fraying.
Ideally, you want the cable to be long enough so that you can tie up the shifter and brake cables neatly, but not too long such that it affects shifting performance.
Cassette
I currently use a Shimano R7000 11-32T cassette, which I find to be the perfect range when paired with a 56T chainring. I tried the higher end Ultegra R8000 11-30T cassette briefly and didn’t really notice a difference in performance (the difference is probably just that the R8000 series is slightly lighter), and I missed the extra 2T on the low end when climbing up steeper slopes. However, if weight matters to you, get your hands on an R8000 soon (there is also an 11-32T configuration available) because they’re probably going to be phased out within the next two years due to the arrival of the new electronic-only 12-speed Ultegras.
If you have a freehub that can only accept up to 10-speed cassettes, try going for a CS-HG800-11 cassette instead. Offered in configurations beginning from 11-34T and higher, you are able to fit in a 11-speed cassette in a 10-speed freehub. Conversely, if you want access to a higher gear range on a 11-speed freehub, you can use the CS-HG800-11 cassette but you will need to use a 1.85mm spacer with it.
There are offbrand cassettes available such as those from “Sunshine”. Personally I would stay away and go with a tried-and-tested brand as much as possible.
Chainring, Crankset and Pedals
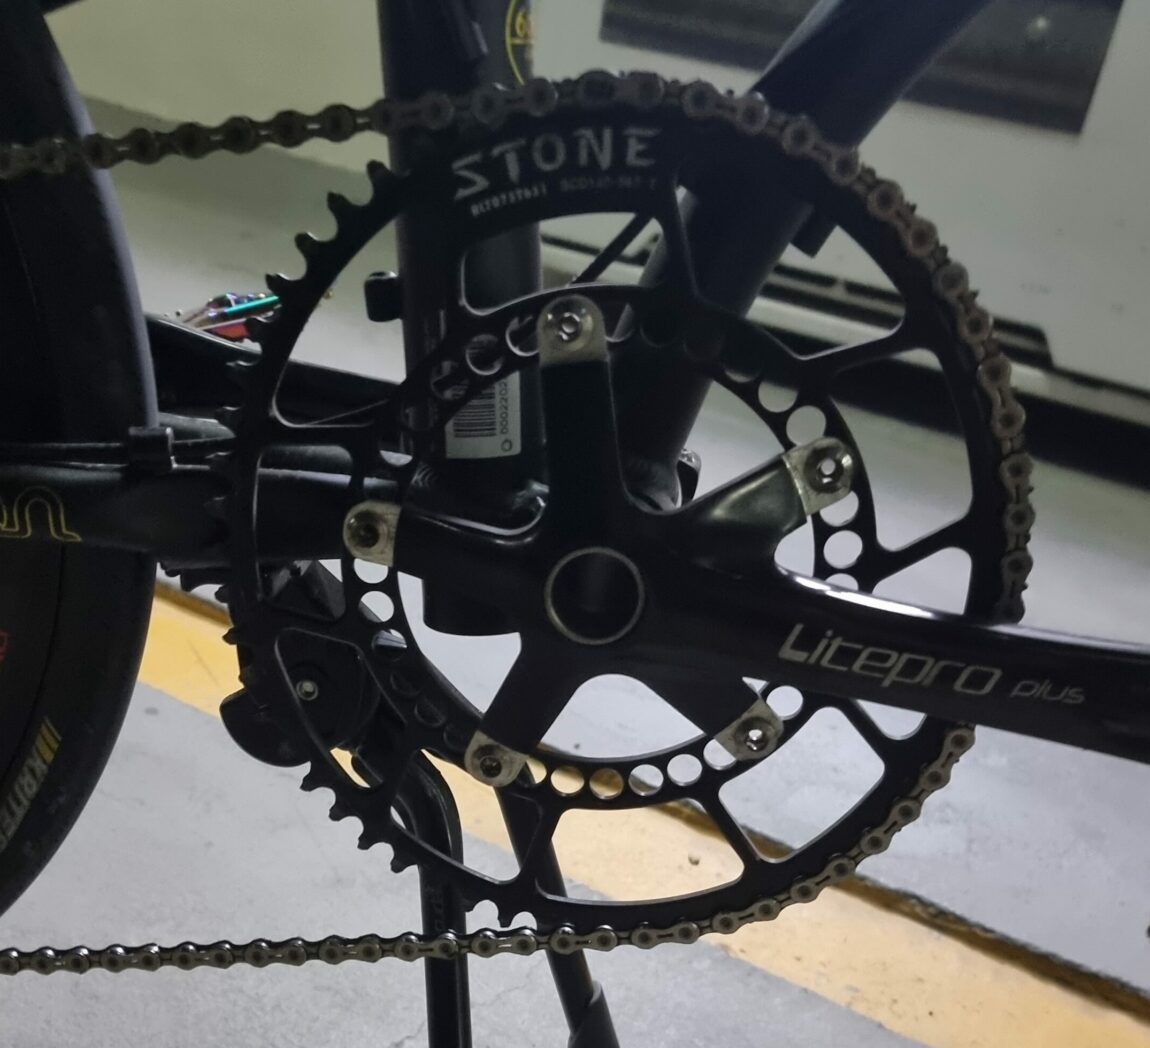
I used the Stone Oval 56T chainring on this bicycle. To be honest, after a couple of rides, I don’t really feel any difference between a conventional chainring versus an oval chainring, but this one is good so I’m sticking with it. If you’re looking specifically for an oval chainring, I would recommend the Stone over Litepro as this has narrow-wide teeth and thus less prone to chaindrops as compared to the Litepro.
The crankset is a typical one from Litepro. I opted for a more conventional design as opposed to those “super-light” kinds such as those from Bolany as those are known to crack after a while. Safe, rather than sorry.
Pedal wise, I opted for an “oil-slick” coloured design just to add a dash of colour to the bike. I have not experimented with quick release pedals or those that are suited for cleat shoes. A thing to note about pedals are that many options out there have really sharp “spikes” at the top presumably for those using cleat shoes to get a better grip. In practice it just means lots of accidental cuts…
Seatpost and Saddle
As I covered in my earlier article, the Litepro A62 is my seatpost of choice, although it only comes in black. If you’re lighter and wish to add a dash of colour, you may wish to try the Litepro A61.
Saddle wise, I didn’t opt for anything fancy but went for those foam cushion kind which is adequate for long rides.
Chain
I use the KMC X11EL chain which has been serving me well. It uses reusable quick release links so taking the chain off for cleaning is not much of a hassle. Be wary of fakes, though. It’s best if you buy from a reputable local bike shop (such as Lew Bike Scooter in Hougang/ Punggol), or if buying online, read reviews before purchasing. Chains that are priced too cheaply (below $40) are likely to be fake. Apparently, KMC chains that reference “KUEL MENG” instead of “KUEI MENG” at the back of the box are likely to be fake too.
The reason why I chose KMC over Shimano is that it’s easier to maintain. With Shimano, quick links are non-reusable (although I guess there wouldn’t be anything wrong if you were to reuse them once or twice…) and the chain is directional, so you need to exercise a little bit more care when installing the chain.
If you’re looking for the cheapest, decent quality chain, head over to Decathlon. Their chains are rebranded from KMC’s Z series, which is KMC’s lower-end range but still perfectly serviceable. At less than $20 per chain, the chains get sold out rather quickly, though. The quick links use the non-reusable type and are really difficult to put on/ remove for some reason, but Decathlon chains offer very good value for money.
I use Finish Line’s Ceramic Wax to grease the chain.
A Great Experience
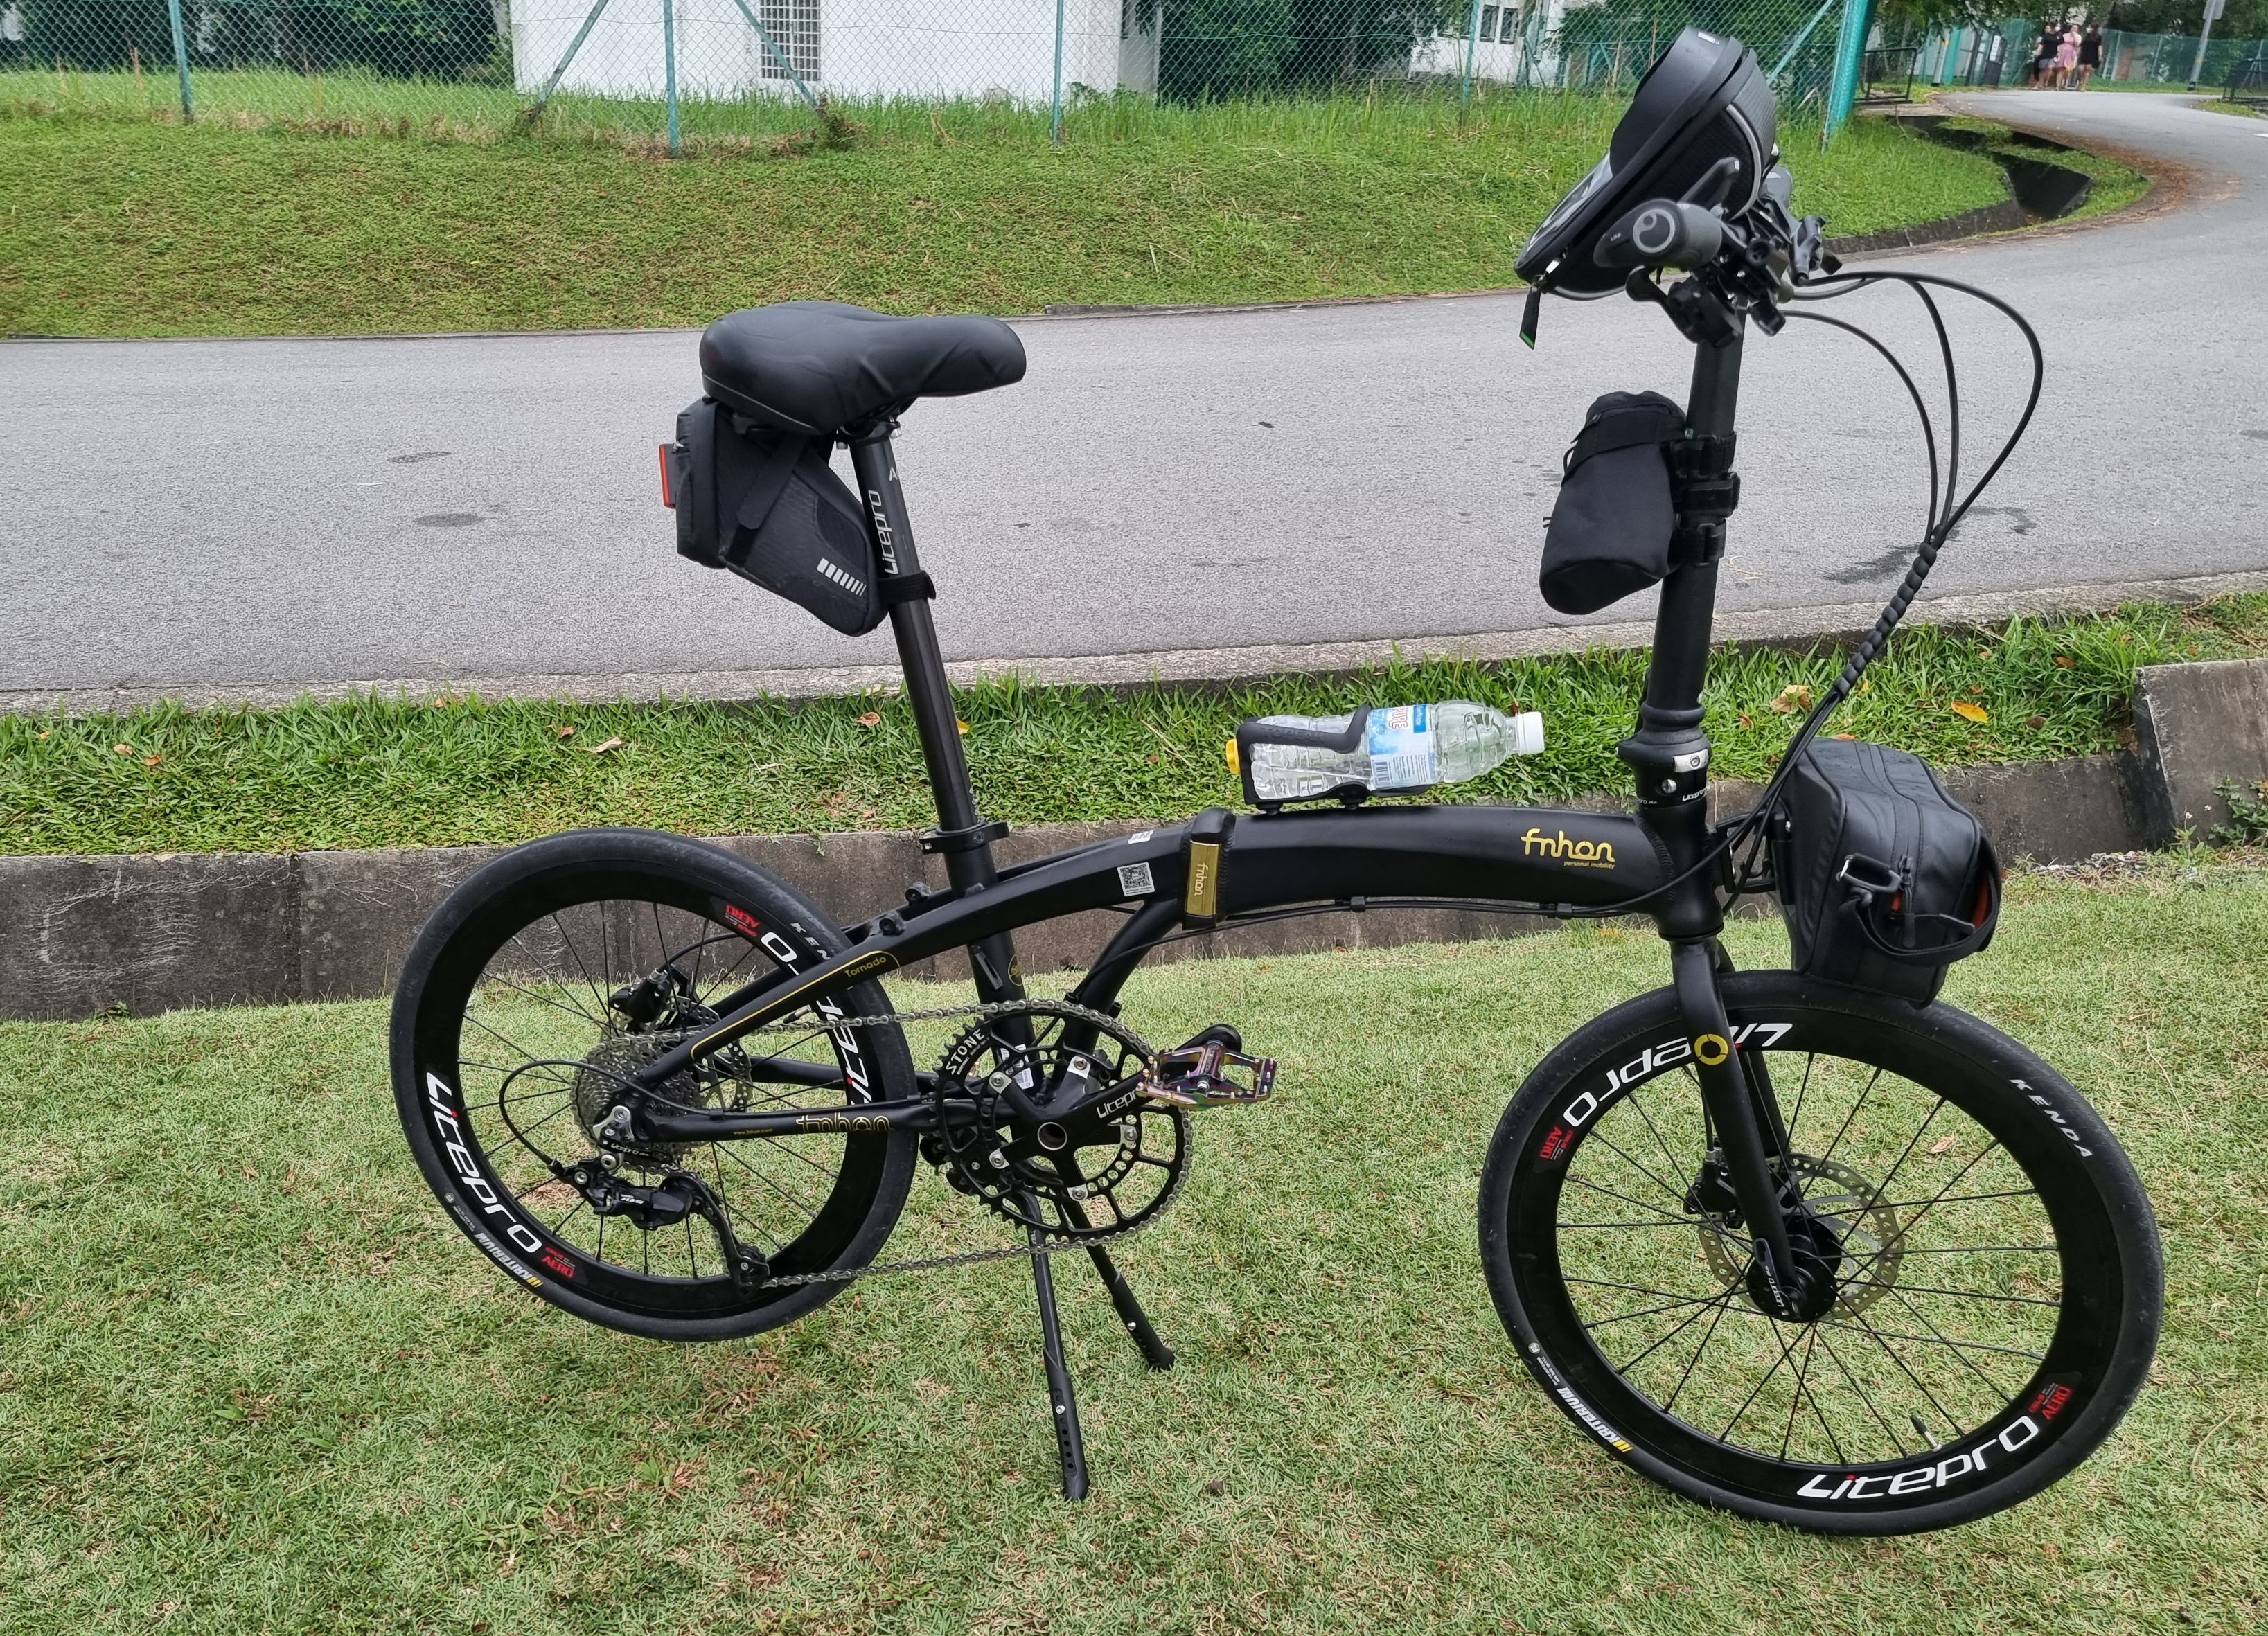
Overall, I had much fun building my Fnhon Tornado from scratch and I guess I’ll be sticking to this bike for the foreseeable future.
Bro, may I know if the minor dings on your bicycle fork and on the head tube have any structural issues? Cause my bicycle also like this and I am abit concerned like you did.
Do you have a photo of the “dings”? A bit hard to judge without photos
How do I send you the picture? It seems like there is on pics upload function
You can email me at trenzterra@gmail.com
What the weight of your bike? And do you think fnhon better than crius?
I did not weigh it but definitely not the lightest given I try to avoid carbon parts if I can. Both are about the same to me having used the Tornado and the Master-D.
What BB you are using?
I’m using the Shimano BBR60